

Well I've been working a bit here and there still fighting allergen problems ( frigging Tree pollen!).
The interior is finally finished being painted.
I'm still working on the lights , and ran in to a major problem last night that I will go in to in a moment.
The major feat last night was I got the wings installed on the wing roots. One went on with no problems ( left side) the other major problems... mostly due to yet another horrid casting job by FW ( not I found a date stamp for the cast on the under side of one of the engines any one want to take a guess? Try 2002! EeK!). After using a huge amount of Gap filling glue I gave up and am having to break out the Aviation putty or Green stuff to fix the approximate 1/8" gap on the top of the Wing root , same for the rear end of the wing root. The wing is on there very well , just there is an unsightly gap.
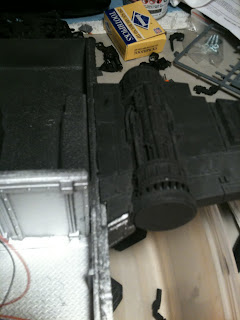
 You can see some of the wiring for LEDs in the pict above.
The other problems I ran in to when test fitting the upper hull are two fold.
1. There is a "slight" indentation on the lower lip of the upper hull, this is where the wing root meets the upper hull. On the side that fit well this indentation is not deep enough, so the hull wont sit flush in the groove. ( pict to follow) This won't be hard to fix, just that I had already primed it and it will require some dremil work.
The left wing .... it's ok!

The right wing .... Not so much.
2. After test fitting the full multi section upper hull , originally I though I would be able to leave on part of the hull "loose" to get to the batteries for the LEDs.... This assumption was very wrong.I can't get that section of the hull off when the front ( with assault ramp) and rear hull are glued in place. The hull sections all fit together tightly like a puzzle. So I may have to install a Batt door on the bottom now which will require a lot of cutting or mounting the batt on the "rear" drop hatch in the lower assault bay, with a hinge and magnets to open the door. This would be the easy way to do it, but then if the front Assault door is open ( why would it not be if I'm putting lights in it and went threw the trouble of painting the details in there!) There would be this Honking 9v batt sitting in the back end of that area...very visible with all the lights in there.
Any thoughts?
No comments:
Post a Comment